Soap Making is an exceptional hobby everyone can try. Soap making isn’t all about using complex and big factory machines. Rather, there are natural ways to personalize and make homemade soaps. The most beneficial thing about making soap at home is knowing the natural and helpful ingredients to use. You can ensure that no harmful chemicals will be added.
Most people make their soaps, mainly because it is fun, and they get to add their personal touch into the soap. Aside from that, the soap sold in the market can be harmful to the skin because of the chemical ingredients added.
These chemicals may cause allergy, itchiness, and dryness. That’s why the safest way is to make your soap. Soap making is easy once you get to know the basic ways on how to do it. There are different variations you can try. Soap making is not meant to be tiring, so have fun while learning and get your version of organic soaps.
Why You Must Make Your Own Soap
Aside from making good aesthetic soaps, soap making also gives the best benefit. You might wonder why you have to go through troubles to create your soap when there are thousands of options you can get in the market.
Soap is created when a chemical reaction happens between oil, lye, and water. The process is known as saponification. In saponification, the lye is processed to help form the soap.
There are a lot of lovely soap options available in the market. All of them have different scents, colorful packaging, and different flavors and colors. However, they are mostly labeled at beauty bars or body bars, but never labeled as soaps. It is because these are not soap; instead, they are detergents.
Detergents are petroleum-based, which is similar to gasoline. It uses artificial colors and scents and other harmful chemicals, which leaves your skin dry, and itchy. That is why allergic reactions can occur when using these detergents.
There are also harmful ingredients such as triclosan and BHT, which are bad for the skin and make cause cancer. There are also other chemicals added on the soap that you might be too lazy to research that may cause more harm and good.
Benefits of Making Your Own Soap
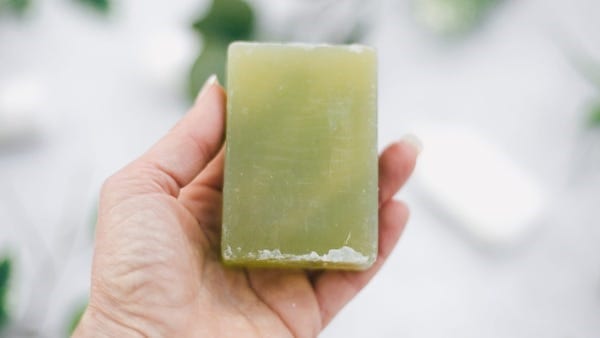
Making your soap gives you the power on the quality of ingredients you use. You can make soap out of the gentle and natural ingredients to avoid damaging your skin. You can also address your skin problems by making organic soaps that could cure them.
For example, when you have dry skin, a moisturizing soap using honey can improve it, and when you have too oily skin, clay soap can do the trick. Essential oils are also beneficial for your skin since they are made from natural plants.
Processes of Making your own soap – Cold Process VS Hot Process
Cold process soap is done without the use of heat, while hot process soap is done by cooking in a pot for a quick soap making procedure.
Cold Process Soap Pros
- You can make aesthetic soaps. You can make beautiful soaps with layers of colors and designs; the cold process makes it easier to do. Get creative and make numerous wonderful soaps designs easier in this process.
- Cold process soap takes a lesser time to do. The waiting process is long, but the actual amount of time to work on the process is lesser. Not much energy is needed. This is good when someone has a lot of time available.
Cold Process Soap Cons
- The cold process is easy and quick, but the curing time is longer. It takes more or less six weeks for the sap to be cured, and the chemical reaction is complete. This means the lye has completely disappeared.
- The temperature must be right. You need to make sure the oils and liquids are at the right temperature to get a successful cold process soap.
Hot Process Soap Pros
- You don’t have to wait. The soap is ready to use. Once it hardens well, for maybe a few days or a week, you can use the soap immediately.
- Scents are observed to last longer and remain stronger even when you don’t cut the soap into bars and let it just sit for weeks. The scent will remain.
Hot Process Soap Cons
- The cooking time lasts for about an hour or so, so you need to spend extra time on stirring and cooking the soap. You have to wait and observe until the soap is done and ready.
- It is not as attractive as making in using the cold process. Unlike the cold process soap, it doesn’t have a smooth and nice finish. You won’t be able to get the aesthetic soaps you may want.
Your Soap Making Guide Using Cold Process
Choose the Recipe
There is a lot of soap making recipes available. Choose one that you want to do. You can go all-natural or want to find a specific soap, then go for it. Make sure to secure the recipe and get the ingredients ready.
Make sure to run the recipe through a lye calculator to determine the amount of lye you need and know how much changes you need to do when you want to remove and change specific ingredients. There are lye calculators online that you can use.
Ready the ingredients needed and make sure you have everything in place.
Get the mold ready
There are mold boxes available such as wooden mold, Rubbermaid, cardboard boxes, and silicone pans: all these are good molds for your soap. There are also other shapes and sizes to choose from if you want to get a more unique and creative shape. Cover them in parchment or freezer paper.
Get the right weight
Measure and weigh your water and lye. Double-check the amount of lye and water needed. To be able to have a successful soap making, the amount should be weighed correctly.
Mix Lye and Water
Be careful when doing this. Make sure your face is turned away to avoid inhaling the fumes. Lye and water when combined heat up, so you need to be at good room temperature with the windows open. Make sure the environment is free from any children to avoid accidents. You can use a mask for safety purposes. Stir the mixture with a plastic or rubber spoon until the lye is fully dissolved. Once it is done, put in a safe place away from children and let it cool.
Oils, Butter & Other Ingredients
While the lye solution is safe and cooling, prepare the oils, butter, and fats. Heat the mixture together and put it in a steel soaping pot to cool off. Make sure the mixture is heated up and mixed well.
Check the temperature
An added essential thing to look into is the temperature of the oil and the lye solution. Check the needed temperature in the recipe to know the right time to combine the two solutions. Others choose to mix them while the temperatures are somewhat close to each other, and some even mix them the next morning. It depends on your preference and the recipe guide.
Blend
Blend the soap with a few seconds of intervals so it will turn thick but not making it too thick. Once the solution leaves a trace or pattern once you drizzle some on top, the solution is ready for molding.
Pour in the mold
Once it is ready, pour the soap mixture into the mold. Make sure to get rid of the bubbles and air by gently rapping the mold into the table. Be careful with the soap mixture since it is hot and may burn your fingers.
Cover the mold
Keep the mold warm by covering or insulating it so the saponifying process can start. Check it once in a while. If there are cracks on the top, this means the soap is too hot, so you need to uncover them.
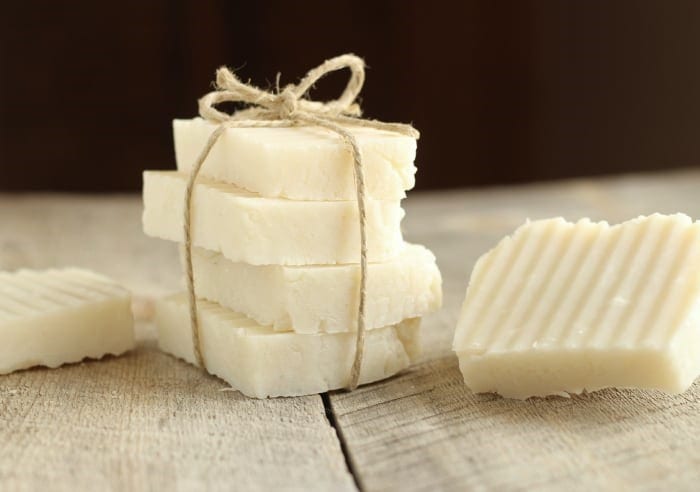
Unmold and Slice
Cutting the soap can be done soon after making it, so it’s easier and softer to cut, or it can be done later when it has completely dried out. The last part includes the soap making cure, which could last for weeks. Put them in on a tray with wax paper and store them in the open air away from children.
Conclusion
Soap making is easy and fun. There is something beneficial in knowing the natural ingredients of the soap. It is also helpful, especially when you have skin problems and allergies you want to cure. Soap making can be your hobby and your step closer to using all-natural products.
There is also no need to fear the use of lye products. Lye can be dangerous, but with extra precautions, you will be able to prevent any accidents. You can start by making small amounts until you are confident enough to add more.
The best thing homemade soap can give is the authenticity of the ingredients. They are suited for your skin, and there won’t be room for any chemicals. You can stop having dry skin using the all-natural beneficial ingredients. Start making your soap now and watch your skin glow.