Are you interested in jewelry? Do you think your whole OOTD or outfit will not be great without mixing it with some jewelry? Why buy some expensive jewelry when it is possible for you to make your own fashion jewelry?
You may have observed some jewelry with resin at the jewelry stores or shops. A question about how it is done may pop up in your mind. This article would help you in learning how to create jewelry resin easily. Believe it or not, you can actually make your own jewelry at home. All you need to do is to follow the process and prepare the materials needed.
Resin Jewelry Making: Requirements
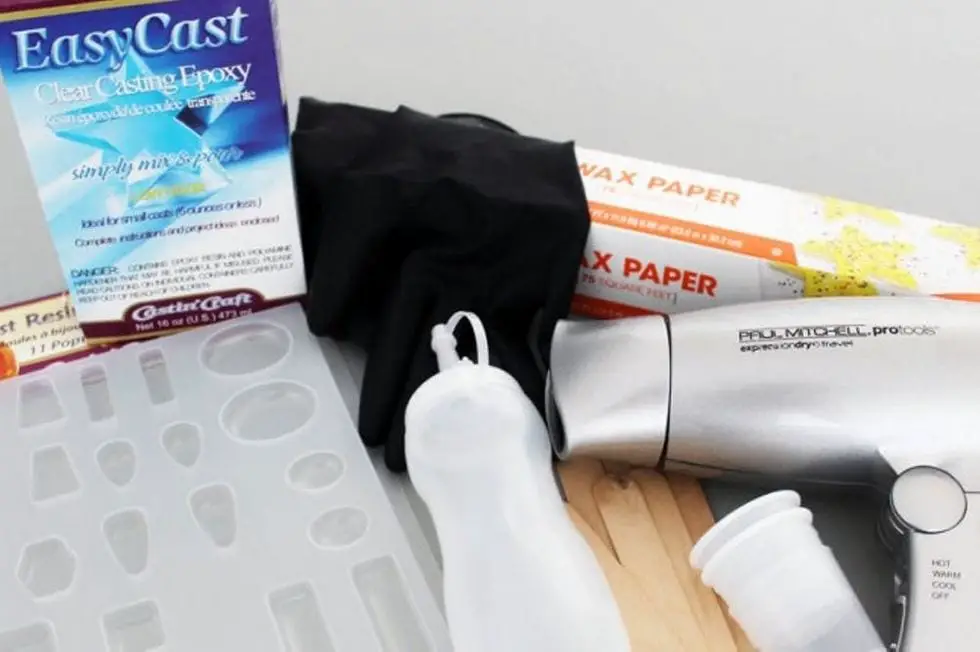
The first thing that you must do it to know the materials needed for making jewelry resin. The next thing is to make a list of the requirements. After that, you have to buy the needed requirements. The most important thing is that you should buy the tools with great quality and can really help you in finishing your work well. Here are some tools that you might need in making resin jewelry:
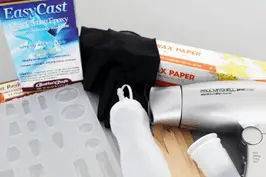
Materials for Resin Jewelry Making
Clear Epoxy Crafting
- Jewelry Resin Molding
- Paper Wax
- Gloves (Latex)
- Cups (Prefer medicine cups)
- Bottle (ceasing bottle that can be squeezed)
- Blower (it is used for drying)
- Popsicle sticks (wooden)
- Plastic Bin or Shoebox (It is used for covering the molds)
- Dried Flowers, Studs, Feathers, Jewelry, Glitter (Resin Fillers)
- Flat pins (for safety), clasps, ring pads (Jewelry items)
- E-600 adhesive quick hold (it can be used to make pins or rings
- Plastic cup for measuring (this is an optional tool)
Steps and Ways on Making Resin Jewelry
There are some things you need to follow in order for you to successfully make resin jewelry. You need to do it correctly, so the result would be good, and it would be the expected result. Here are the steps on jewelry making with resin:
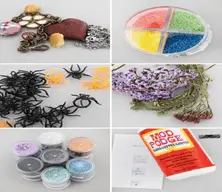
· Fillers
It is important that you prepare water and that should be hot water. Put the water inside of a bowl where you should also put the bottles for hardener as well as the bottles for resin. This should be done while you are getting your fillers.
You have to do that for the purpose of mixing the resin in a nice manner, and it is also for you to prevent some air bubbles. In doing it, put some wax papers in your workplace. Wax paper is used to protect your workplace from the resin because it can’t be removed. After doing it, you have to prepare the fillers. You can use dried flowers, studs, feathers, jewelry, or even glitter for the resin fillers.
· Organize the fillers
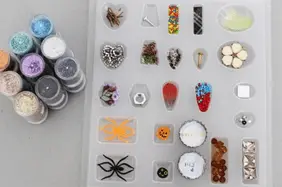
Organization of the fillers
You need to prepare the resin jewelry molding tools. The molding tool is used for the fillers to be organized and for the reason that they will not mix up. You have to prepare everything you need so that you can do this process properly.
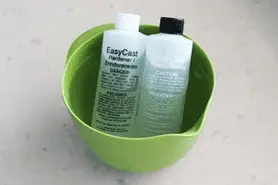
· Mixing the resin
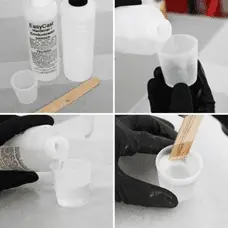
Mixing the resin
It is essential for you to get a measuring tool. If you will not be creating more fragments, it is okay for you to use the measurement of syrup or any cups that can be used for measuring. A part of the hardener should be combined with a part of resin. After that, you have to do the mixing and make sure to mix it thoroughly. You can use any measuring cup for this, but you should remember to mix the two requirements evenly. It would be better to measure the hardener in to one-fourth cup as well as the resin into one-fourth cup, too.
· Mold
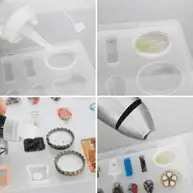

Before putting the things in your mold, a resin should be poured first. Make sure the poured resin should be a layer of it. If you think you have to add a resin, you can add a layer to it again. You can also be more creative by adding glitter design on your molds.
Make sure to prevent air bubbles. Another way of avoiding bubbles is through the use of a blow dryer. You can blow dry it. Cover the molds, and you can use anything for covering the molds. You just have to make sure it would cover the molds properly so it will be protected from the dust. If you have already made the process, you can leave the molds there for the whole night.
If ever the resin did not harden well, you can use the other way of hardening it. Another effective way of hardening the resin is by putting the resin inside of the freezer, and you should set the timer for ten minutes duration time.
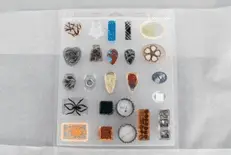
· Finalizing of the product
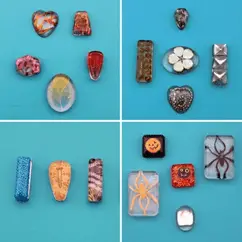
Image A

Image B
Image A: The finished product and Image B: Metal Pin
You may have already made the jewelry, but you can’t use it without the handle or metal on it for wearing. For you to be able to wear the jewelry products that you have made with resin, you need to put something on it.
If ever you want to make some necklaces and bracelets, you can put loops that are made of metal for the chain. You can do that by making a loop made of metal, and it should be made along with the pin. You can use a stove or a candle for heating it up, and after that, put it inside of the resin.
If you want to make pins as well as rings, you can put the metal together with the jewelry by gluing them. You have to put pressure onto it until you are able to feel that the metal is strongly attached to the jewelry.

Conclusion
It is amazing how creative minds come up with something beautiful, but less expensive compared to the ones in the stores. Everyone can create their own jewelry as long as the steps and guides are properly followed. At first glance, it seems difficult to make jewelry resin. However, by the ways given in this article, it is quite easy. You do not have to invest much money, but you have to invest much of your time.