Whether you are planning to gift it this Christmas or plan to start your own online jewelry store, a glass necklace is always going to be a stunner. Seen on red carpets and in thrift stores too, these glass necklaces come in all shapes, sizes, and styles. They make your outfit look Bohemian or chick based on the type of glass you choose.
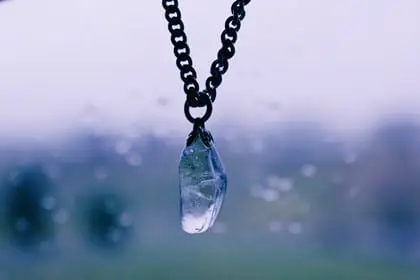
You could use a memorable picture or a very precious sea glass-one that deserves a place near your heart (see what I did there?). No matter what you choose this is one of the perfect DIYs for the holiday-gifting season.
Image Source- Pexel
Now, before you get into the DIY, remember that this is your idea. Do not hesitate to add your own touch to each of the necklaces or pendants. If this is a gift, keep in mind the liking of the person receiving it. Superheroes or cartoon characters, logos, or sun signs, you can fit everything in this small piece of art. Be as creative as possible to make a unique piece out of it.
For Beginners, a Jewelry making kit that contains all the required materials is advised. You could buy one off the internet. But, ensure that you buy one that has pendant trays, epoxy glue, epoxy/glass domes, clasps, bail mount(hook), and chains for the necklace. With the kit, you are equipped to become a DIY pro. All you need now is an easy guide to become a DIY Guru.
Here are a set of steps you need to follow.
Steps to make a Glass Necklace
Before we delve into the details of making different types of glass necklace, first pick the STYLE.
There are several types of glass necklaces but the most popular is the Sea Glass Necklace and the Glass photo pendant necklace. To choose the right style define the purpose of your DIY. Are you gifting this as a memory to a loved one? If yes, then you might want to choose the Glass Photo Pendant Necklace. If you are gifting this necklace as a statement piece and would want him/her to wear it all the time, the sea glass necklace is your game.
With the style choice in mind let’s delve into the steps of making these two different yet awesome glass necklaces.
The Glass Photo Pendant Necklace
Materials Required:
- A selection of patterns, pictures, etc.
- Pendant Tray in Copper, Silver or Gold color.
- Clear Glass or Resin dome.
- Strong Adhesive for the tray.
- Glue that dries clear.
- A Chain in Copper, Silver or Gold color.
- A small piece of cloth.
- Scissors.
- Color Pencils or colored markers.
- Paintbrushes and Paint.
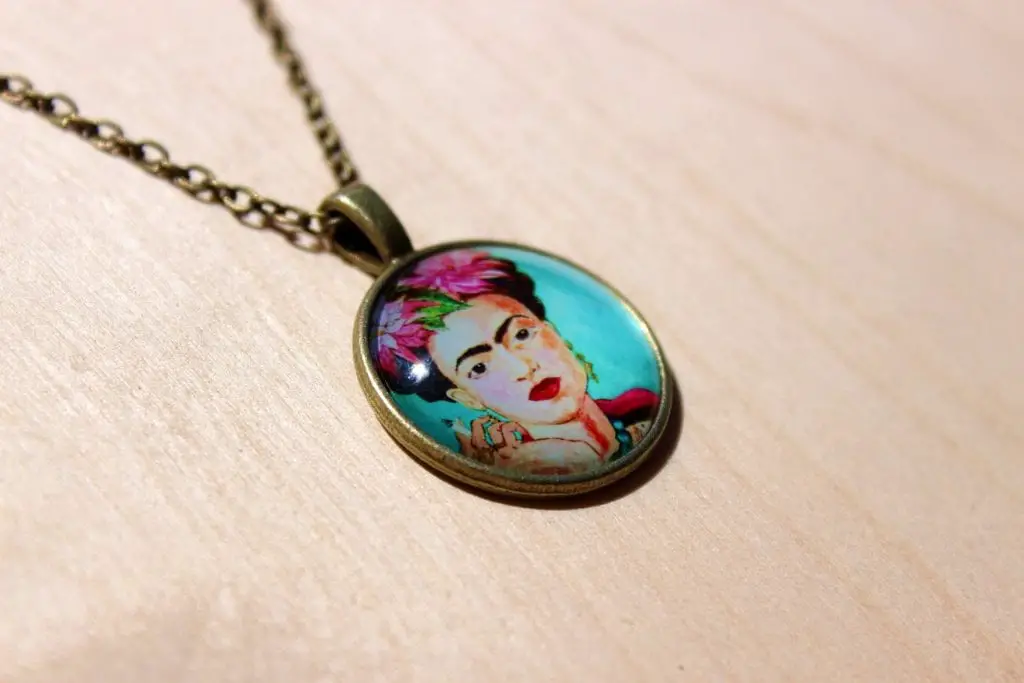
Here’s a custom-made glass necklace with the image of Frida Kahlo.
Image Source- Pixabay
Step 1: Select the Photo/Image.
This is a crucial step that allows you to be creative. It also lets you make the pendant as personal as possible. Choose the best image- of flowers, fabric patterns, favorite words, sun signs, lucky number, spirit animal, or even a miniature version of your childhood photograph.
Note: If you are good are drawing or painting, you could even make the photo or image. Draw or paint a miniature version of a scene from a movie or a beautiful flower pattern.
If you decide to take print outs of patterns or photographs, make sure the paper is matte rather than glossy. The glossy paper tends to cause bubbles after applying glue, which gives a bad look to the finished product.
The world is your oyster yet keep in mind the size of your pendant tray while selecting the image. Once you’ve decided, trim it to the size of the tray you will use and set it aside.
Step 2: Clean the Pendant tray and the epoxy/glass dome.
Pendant trays come in all shapes and sizes. Round, square, curved, rectangle- a collection of all shapes is good to have in your DIY kit.
A clean pendant tray and even clearer dome allow for a plush look of the pendant.
Ensure that your hands are free of any oils or moisturizers because they can leave a mark on the dome. Also, check for any minute scratches on the dome and make sure you reject such domes or polish them.
Clean the tray with a lint-free cloth to remove dust. This ensures strong adherence between the tray and the photo.
Step 3: Stick the photo and dome on the tray.
You do not want the image to move when you are working with the pendant dome. To prevent any mishaps, apply a small amount of strong adhesive on the tray and stick the image on it in the direction that you desire.
Next, take some glue that is strong and dries clear. Or, if you have access to it, you could also use mod podge. And if you are lucky you can also find domes online that come with self-adhesive backs.
Apply this clear adhesive on the patterned top of the photo. Immediately place the glass dome on top and press it down for a few seconds. Clean any extra glue/adhesive that oozes out on the sides with some cloth.
If you want to add some bling to your pendant, sprinkle some sparkle dust over the photo stuck to the tray. Apply the glue over this photo and press the dome on it.
Allow the glue to dry completely. The time depends on the adhesive you use.
Tip: Dry it for a while with the glass dome on top and then flip it over the let it dry with the tray side up. You could even leave it in the sun for a few hours.
Step 4: The Finishing Touches
The necklace is almost done and all it requires is a chain.
Select a chain of the desired color, silver or copper. Run it through the loop on the pendant tray and ta-da, your Glass Paper Pendant Necklace is ready!
Sea Glass Necklace
A Sea Glass Necklace is a statement and the technique explained below can even be used for other crystals, precious stones.
A precious stone, crystal, resin glass, and fused glass can be great choices for this project.
Materials Required:
- Sea Glass Piece or crystal piece of your choice.
- A chain of your choice-copper, silver or gold in color.
- Same colored bail mount (find one with a loop).
- Strong Adhesive or glue.
- Pliers.
- Nail File to rub sharp edges.
- Flexible Wire.
- Dusting brush.
Step 1: Choosing the perfect glass piece.
Choose a glass piece or crystal that does not have any point edges and is quite small. You could even carefully rub away some pointy edges if necessary.
The size of the glass piece should also be kept in mind. The smaller the size, the more elegant the look of the necklace. Also, a heavy stone might not be comfortable around the neck.
Ensure that the crystal is not too big for the bail/hook. Otherwise, the crystal can break away due to the extra weight.
If you find any impurities on the surface, try cleaning the crystal with mild soap water and a brush.
Step 2: Fusing the glass with the hook or bail
If you are using a bail mount, apply some glue onto the mount and stick the crystal to the bail. Hold them together tightly or place it on a surface and place a slightly heavier object on it for some time.
Another technique you can use is with the help of a flexible wire. Bend the wire and wrap it around the glass/ crystal artistically. Create a cage-like structure within which the crystal looks entrapped. Work your way from one end towards the other one, and make a loop using pliers. Ensure that the wire is wrapped tightly around the glass, so it does not slip away. After making a strong loop, wrap some extra wire to make it strong and cut off the excess wire.
Step 3: Finishing Touches
For the glass piece with the bail, thread the chain of your choice through the loop of the bail. Leave it on a hook for a few days to test the tension on the chain.
For the crystal wrapped with the wire, thread the chain through the wire loop you created. Here, because the wire is pliable, choose a delicate chain that is thin and light.
Your Sea glass or crystal necklace is ready to be worn as a statement piece on any outfit.
Since this is an easy DIY and takes very little time to make, you could make these in batches. Making a combination of Glass Photo Pendant Necklace and Sea Glass Necklace can be useful when you are looking for gift ideas.
You could also make other jewelry that matches the glass necklace. It could be a ring, a pair of earrings, or a dainty bracelet made up of small shards of crystal.
And once you master the art, viola, you can continue making them and sell them online too.