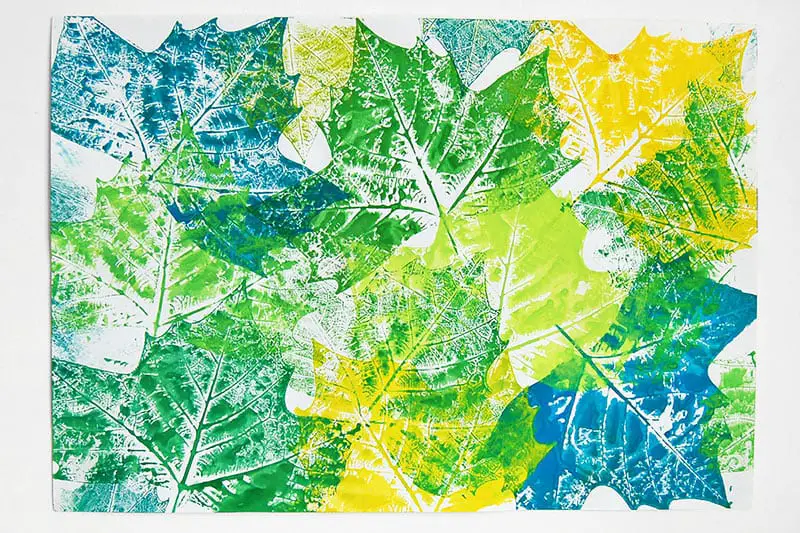
What is printmaking with leaves?
Print quality has become one of the art community’s favorite types of painting, including scrapbooks and photography. It is absolutely adorable how you can take necessary household products, cut fresh fruits and vegetables, and using them to print a wide variety of styles and structures.
Fruits and leaves create especially stunning and exquisite images that can be grouped together towards walking trails or recreational playgrounds. Please attach it to the Nature Book, using it to make large-scale paintings, print it onto prints, or even transform it into packaging papers and present tags.
Things you will need:
- Leaves
- Plastic takeaway containers to mix paint in
- Fabric linen cloth
- Tray for paints
- Sponge in a roller preferably
- Plastic drop cloth
- Newspaper and Rolling pin
- Acrylic portrays
- A gentle brush
- Tub of liquid to soak the brush
- Print bleached
- Paper for drawing
Step by step process that you need to incorporate as you start printmaking with leaves:
- Always pick leaves that have a thick vein. Try squeezing out another paint on the color scheme; glass or paper plates work great. Brush the back of the sheet gently with ink, but stop applying too many because it smudges. (It appears to take minimal teaching to get the sufficient combination.)
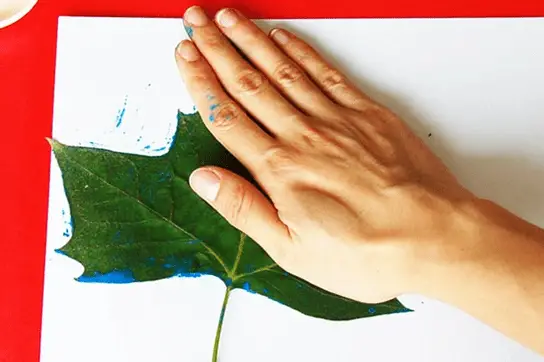
- Place the leaves and stems plaster cut side on the paper and meticulously cover it with parchment paper. Push the brayer surrounded by a white sheet. Carefully peel the paste and the leaf to expose the document.
Position down the center of the leaf vein on board. Putting a towel paper over the leaves, then smash it with mortar so you can see the structure and color tones of the plant leaves through all the paper towels. It’s going to take a while to touch any section of the vine. Quickly remove the cloth and leaves to uncover the print.
- When integrating your final part of the cloth, you might want to exercise how to manufacture with a leaf surface. This way, you will get a grasp of what leverage you ought to force to get a decent print out of each form of the leaf. Set up the job surfaces.
- Using a big table to print the fibers and surrounded it with a disposable slip sheet. The document contained a different area for the decoration of the trees.
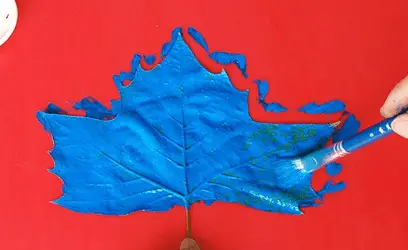
- Immediately begin with the fastest-growing leaf and position it in front of the daily paper. The veins seem to be more dominant on the undersides of leaves, so if you publish that side, you’ll get more details.
- Place the paint further into the tray and brush the surface of the leaf thinly using the brush roller. Consider placing the acrylic side of the blade away quickly on the fabric, not relocating it.
- Currently, take a slice of clean cloth and measure the height of the weed. Move out with the brayer frequently with the same strain. The additional pressure that you desire to implement will depend on the composition of the leaf, the total number of paint being
used, and the flavor of the garment.
- Recognize that side printing is not intended to look flawless. Elegance is indeed often in the blemishes.
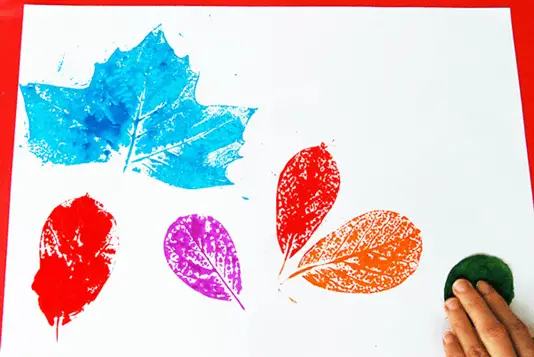
- Consider removing the hand towel and snip the leaves meticulously to discover the printing of sheets. This very same leaves would be used several times, even when it is relatively smaller or delicate.
- Paste all the broad leaves first, saving room for any of the other foliage within them. To establish a spontaneous design, rotating the sheet each whenever you print it.
- Enable the full first color to dry entirely before beginning the next one. Print the small and medium-sized leaf in a nucleotide pattern, some contrasting and some broad leaves. When it is dry, revisit for the completed, green holes.
- Enable the painting to dry entirely before straightening the cloth to steam the paint as per the directions of the maker. You might display on a linen width as on a dining table that has already been stitched in.
Printmaking with leaves’ other ideas and tips:
- Polyurethane paint becomes more durable until it is finished. It’s perfect for writing on the paper. It works wonderfully on paper, too. That being said, it’s a lot easier to scrub dried plastic paintings off your tools.
- The trick is to act efficiently because the paintings won’t dry by the moment you publish. It’s always good to have a convenient fog jar and to spray your paints to prevent them from scratching too easily.
- Cover the work area with plastic wrap or scraps of paper beneath the vine. Place a thin coat of paint on the paper. Generally, the backside provides more fascinating vein patterns. The strength of the color can be like coleslaw or a little more substantial.
- Almost all of the moment, you don’t have to apply water to the coat. Whether the color is too syrupy, or if there is so much ink, it will create splotches and squeezes.
- Using a silicone brayer/coaster or paddle trigger to add a lot of weight when you turn to push the leaves onto the sheet or sheet. Holding the weight low enough that the leaves don’t rise.
Last things you need to understand and consider in printmaking with leaves:
When you have so much parameter to evaluate on your painted leaf painting, you should use a brush submerged in potable water and softly rub over most of the leaves with acrylic paint (also known as transparent painting), aquarium, or acrylic paint. Water reactivates the picture and produces a cooling aquatic impact on the picture of the rose. You can freely watch and check the video to see more tips and actual demonstrations of printmaking with leaves.