
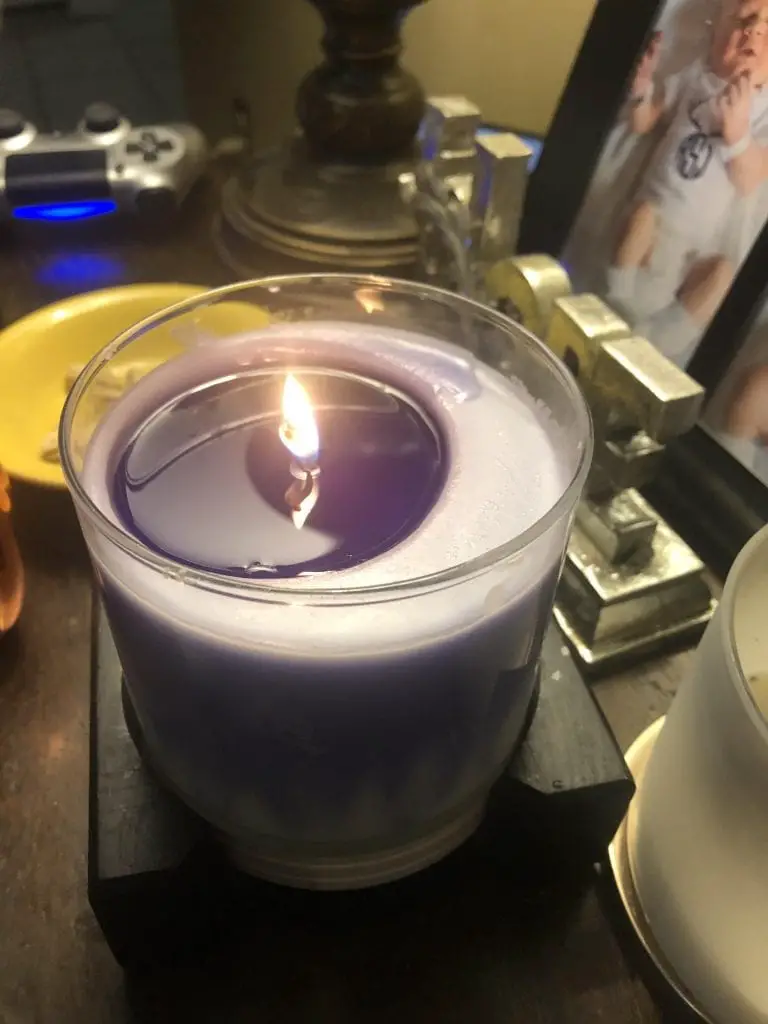
Candle wicks may be the last concern when making candles. You may be occupied with the choices you have for scents, fragrance load, candle wax types, and container. But you have to keep candles burning.
So you might need to change your perspective and pay more attention to making wicks. It will save you from troubles of candles that burn too quickly and make them stay lit. You have to know the right wick for the set of candles that you will be making.
Importance of Choosing the Right Wick
The quality of the candle is also based on the wick as there will be problems when it hasn’t correctly made. Even though you prepared the right type of wax, scent, and container, they will not work out if the wick is inappropriate.
The right kind of wick can be attained by trial and error. You shouldn’t give up easily. If it went wrong, you have to analyze and rewind what mistakes you may have committed along the process.
It may take a lot of your time, but once you get a grip on it, you will be an expert candle maker. To motivate you, here’s the detailed importance of candle making wick.
- Flame consistency and it won’t have a chance to self-extinguish
- Safe as the flame is small and the temperature of the light is in moderation
- Smoke-free without the existence of soot when the wick is burning
- Prolongs the candle’s life
- Clean burn and not toxic
Signs When Using the Wrong Type in Candle Making Wicks
You would know that you used a wrong type of candle wick when you encounter these problems:
1. Self Extinguishing
It means that it fails to burn, and there are two causes for this.
l Wick is too thin and short. There’s a chart size for you to get corrections
l There’s too much fragrance. To resolve this problem, you have to use a fragrance load calculator.
2. Excessive Flickering
It’s not good to have candles that create smoke and soot. The wick is too thick for the size of the candle, so that’s why flickers come up.
3. Mushrooming
It happens when the wick splits when getting burned. It is caused by excess built-up on the tip of the wick. It would be best if you choose a thinner wick.
4. Tunneling
A tunnel is formed when the entire edges of the candle fail to melt. If you have scented candles, it can’t release a nice smell. It occurs due to the following situations:
l The candle is only being lit for a short period so it won’t be able to reach the edges of the diameter. You can let the candles burn within a 4 hours interval.
l If you put a thin wick, it doesn’t have enough strength to make a melting pool.
5. Deep Melt Pool
It’s the opposite of the issue of tunneling. It shortens the life of the candle. It takes place when the wick is too thick for the candle’s diameter. The deep melt pool is more than half an inch thick.
Candle Making Wick Guide
STARTING POINT
To start with candle making wick, there are a few things that you need to know to get things right. You have to consider these:
1. The Candle’s Diameter
Diameter is the most vital part of the candle as it is measured is the basis in choosing the thickness and kind of wick. It’s easy to figure it out as you only need to measure it with the help of a ruler.
2. Color and Fragrance Load
You have to give some thoughts on choosing the color and fragrance load that you want to add to your candles. The more color and fragrance there are, the thicker the wick needs to be. You can use a fragrance load calculator in this case.
3. The Type of Candle Wax
The density and melting point differs in various types of candle wax. So each of them would need different wicks. Beeswax is slow-burning and palm wax is long-burning while paraffin wax is fast-burning.
There are other types of candle wax and you need to check their qualities so you can determine the right wick for them.
4. Burn Time
An example of this is soy wax and paraffin wax. Soy wax burns slowly so it means longer life compared to the thin paraffin wax. You have to use a thicker wick if you wish to have your candles to burn in an hour or an hour and a half instead of the recommended 4 hours. It can melt the candle fast as it quickly makes a melt pool to avoid tunneling.
DIFFERENT KINDS OF WICK
When you’re done with getting the right size, you’re not finished with making decisions over candle making wick. There are different kinds of the wick and you have to know which one suits best with certain candle wax.
1. Eco Candle Wick
It is made out of the interwoven organic cotton and paper fibers. It looks like a coreless braid with good strength in it. It gives a clean burn as it is self-trimming and it minimizes mushrooming too.
It is pre-coated with soy wax with wick tabs. It’s suitable for candle wax that has a low melting point. It’s best for tall container candles and soy pillars with a height of 7 inches like candles in a mason jar.
It can also be used with wax blends and soy container candles. The diameter should be from 2 3/4 to 3 1/4 inches and a height that won’t exceed 5 inches.
2. Flat LX Candle Wick
It’s a braid made from cotton threads with a very flat structure and a wrapping of soy wax. It is biodegradable and environmentally friendly. You can trust this wick in creating a consistent flame. It’s all because of its curling ability and it can reduce soot, smoke, afterglow, and mushrooming.
It should be used for soy container candles and wax blends with a diameter of 2 to 3 inches. They shouldn’t be over 5 inches in height.
3. Hemp Candle Wick
It is 100% organic, non-toxic, and biodegradable and it is made from hemp. It is covered with beeswax. You can avail it in a spool or pre-tabbed so you can make any length of wick. Its pre-tabbed version works well with a beeswax candle.
It functions well with beeswax pillars and container candles with the height not higher than 7 inches. Any height will be found with a spool of hemp wick.
4. Wood Wick
It is the only kind of wick that doesn’t need to be pre-waxed. Using this goes with a sense of sustainability. It can work well with many types of candle wax like beeswax, coconut, palm, blends, and soy.
Trials for Candle Making Wick
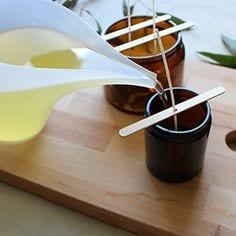
Make 6 to 8 same candles but with different wicks. Label them based on wick sizes and for the sake of specification. Let them burn the wick next to each other. Check them every hour and take a photo of them for comparison. Keep doing it throughout the whole process.
As you have read above, a good melt pool is a sign of having the right wick. Your candle should burn for an hour to consume an inch across its widest point. For example, you need to let your candle burn for 3 hours to check the melt pool. It’s the necessary time if your candle has two and a half inches opening and 3 inches across.
If the wick is right, the melt pool would be half an inch. If you don’t have it, your wick in your candle is too small. If the melt pool is 3/4” then your wick is too big. You have to continue testing until it goes half of the candle. The photos that you’ve taken will give you some ideas.
Some wicks work with different candles or containers. A thicker and hotter wick is needed for candles with color or dye and fragrance. You may also come to a point that the recommended wick for candles with 3” to 4” diameter would be burning well with a candle with 2 and a half inches diameter. So it’s all about trial and error.
Summary
Candle making wicks might be too tedious for some makers, especially for beginners. But once you get a hang of it, you will be making candles quickly with ease. The best part is the enhanced quality of your candle. It’s the result of not taking for granted the part the wick played in candles.
