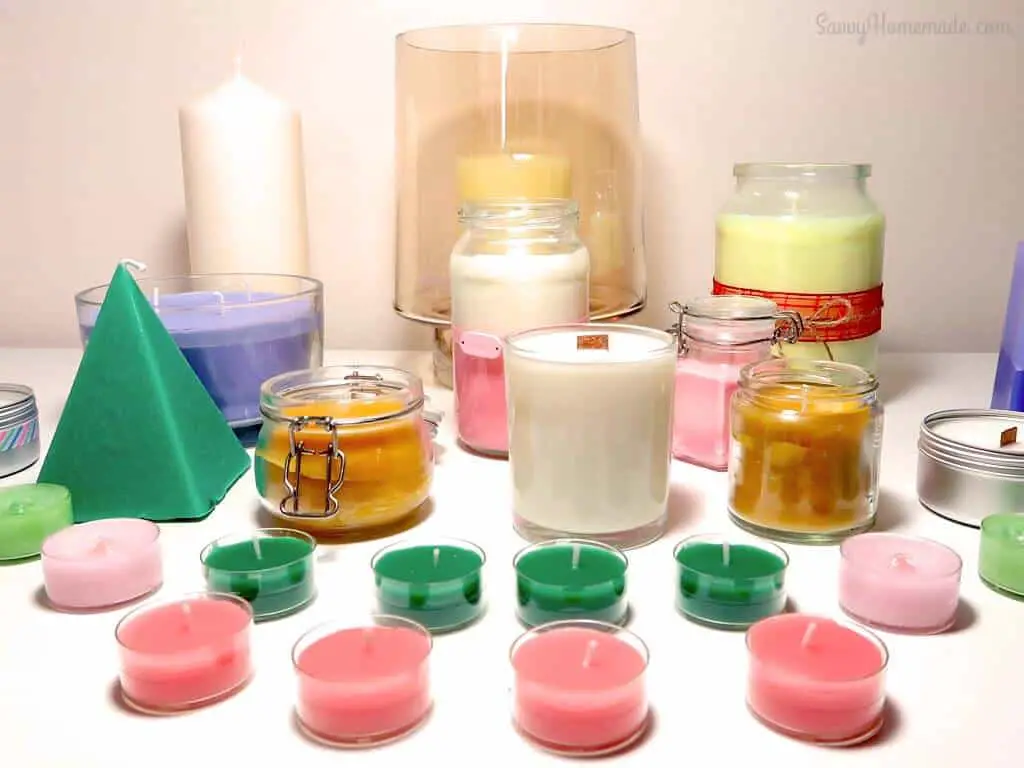
It is common knowledge that candles are more common among modern ladies than men. However, history has it that candle making was very important to villages and kingdoms. Back then, and even until now, the light was a necessity, and their main source of light was wax candles. Homes and businesses depended on chandlers, turning candles making into a profession for craftsmen then.
These days, candles are no longer considered as a necessity. However, they mean value for those who appreciate them. If you are one of them, you have two options available: purchase candles or make your own. While there are different ways to make a candle, one of the most common is making them from wax. Read through to learn more about this process.
Step by Step Guide
Step 1: Preparations
It is very important to note that dealing with wax can be quite messy. As the wax melts, the wax droplets can easily get anywhere. You will not even notice it until the wax finally dries. For this, you can prepare paper towels and newspapers all over the work area. Use them for setting your spatula, thermometer, and others. The good news is that wax is easy to clean up, though laborious. In fact, you can easily scrape it using your fingernail.
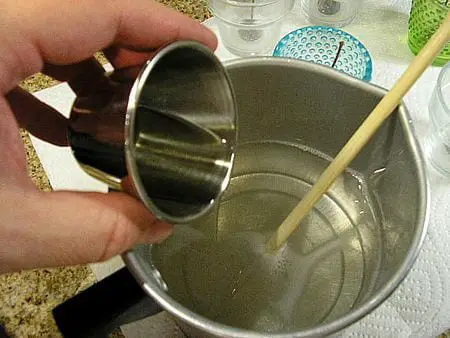
Step 2: Melt the Wax
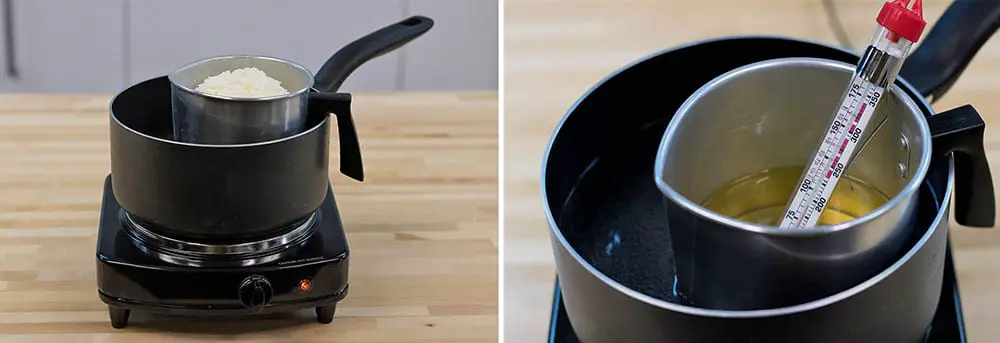
The best way to melt wax is by using a double boiler. With this, you need to put a good amount of water in the bottom part of the pan, and wax in the double boiler, observing it as it melts. Doing so is very relaxing for some. To help hasten the process, you can stir the wax, breaking up the huge chunks using a spatula. About 15 minutes is needed in order to complete the melting process. Make sure to watch over the temperature, making sure that the temperature stays between 160 and 170 degrees. If the temperature goes over that, make sure to remove it from the heat.
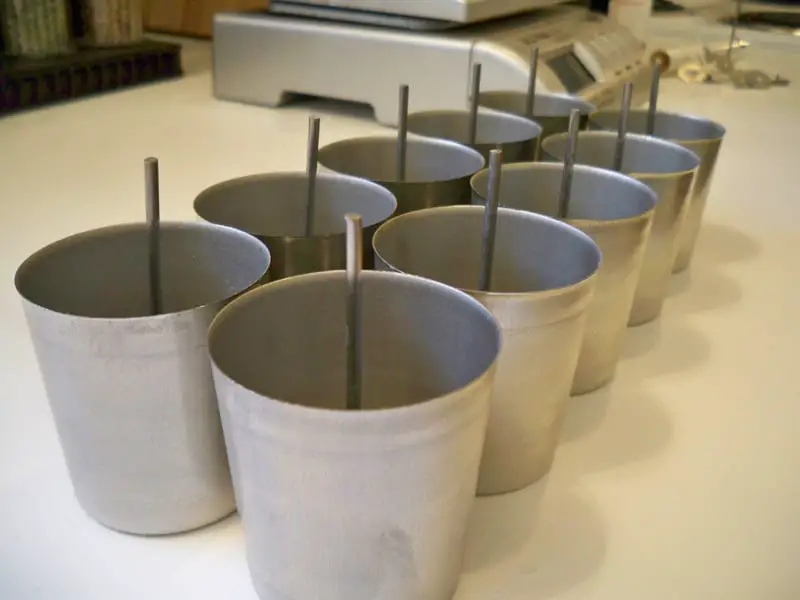
Step 3: Attach the Wick
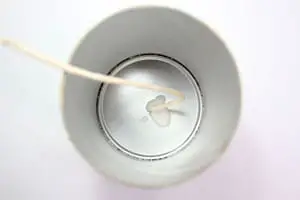
While the wax continues to melt, attach the wick into the container. Notice that some wicks may have little stickers attach to the bottoms, while others do not. An option is using super glue, though some may do some tricks. One is to wait as the wax melts, seeing a pool of liquid. Then, you can dip the wick’s metal tab into the wax that has melted, quickly adhering it towards the bottom part of the container, in the middle. As the wax starts to harden, the wick will be solidly stuck into the bottom.
Step 4: Add Fragrance Oils
After the wax has melted completely, you can then opt to add your favorite fragrance oils. Waxes are different, requiring different amounts, which is why it is very important to follow the instructions well, especially if you have purchased the wax, particularly for this purpose. If you have purchased a huge chunk of wax that is not designed for candle making, using 1 ounce per pound of wax is a safe bet. You can then pour the fragrance oil into the double boiler, stirring another 30 seconds or more to make sure that the oil is distributed evenly.
Step 5: Cool and Prepare
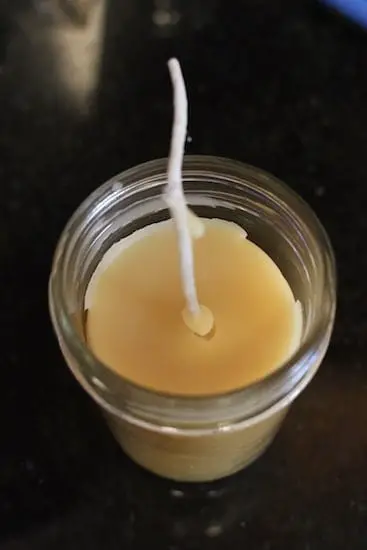
After the fragrance oil is added, allow it to cool for about two minutes, with the ideal temperature of about 130 to 140 degrees. The process does not usually take really long, which is why it is best to keep an eye on the thermometer. After the wax has cooled off completely, pour it right into the container. Hold the wick lightly to make sure that it stays right in the middle, not tugging too hard, or else the attachment to the adhesion may be removed.
Step 6: Secure the Wick
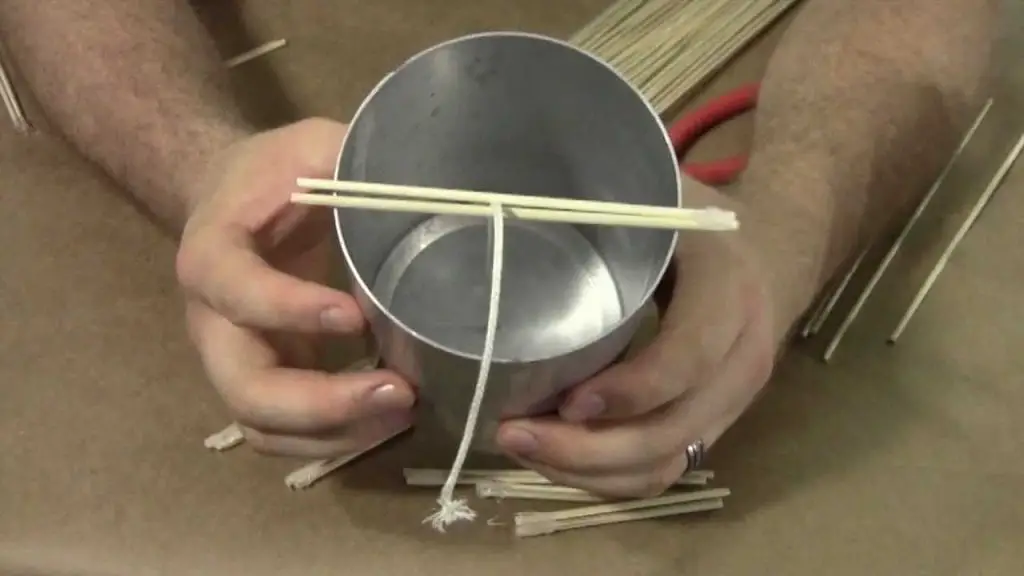
While the wick is attached to the bottom, you would want to make sure that it stays centered as the wax hardens. A wick that is off the center may mean that it will not properly burn. One tip is by placing a writing tool on top of the container while ensuring that the wick stays in between. It need not be secured well, but at least it has to stay right in place for at least a couple of hours.
Step 7: Let the Candle Cool and Trim the Wick
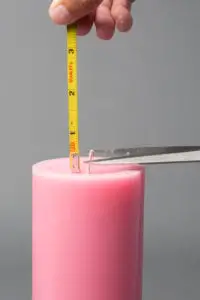
As the wax starts to set, it will start to form a sinkhole right in the center. It has to cool for a few hours. You can then reheat the wax left in the boiler as well as the one on top of the candle. Avoid adding too much, or it may only create another hole. You will also notice that the wick sticks right up the candle. You may want to trim it to about ¼ inches. If it is too long, it may burn hot and big.
Conclusion
The cleaning up process is quite tricky. Reality is that you will not be able to get all of them out of the container, with some in the double boiler, and in some other unholy locations. The best way to do so is to clean up the wax right away using a paper towel while it is not yet solid. If the wax hardens before cleaning it up, it may be more difficult. After cleaning up everything, you can now start enjoying your very own candle!
