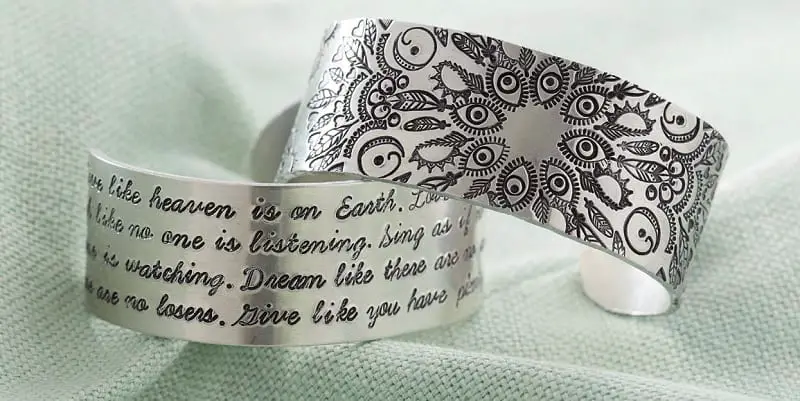
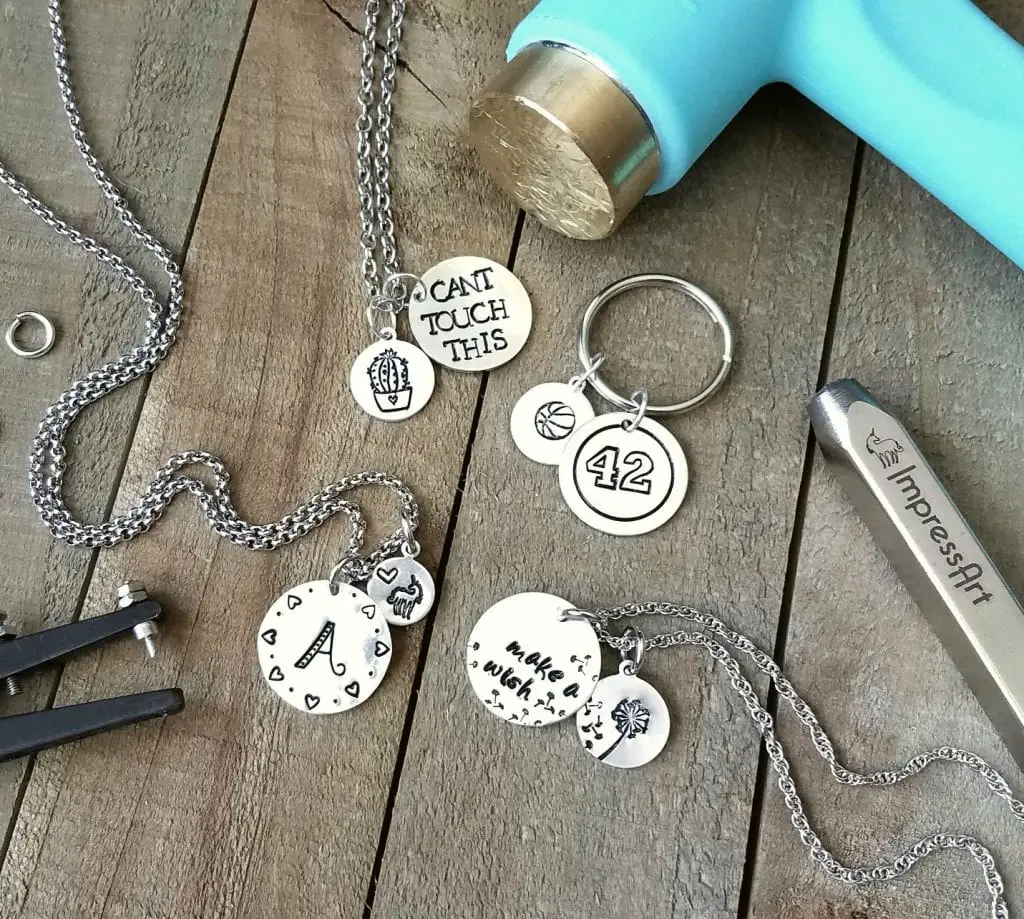
Stamping metal is a good idea to add some sort of customization to your jewelry. You can stamp dates, initials, or names into the blanks or metal tags that you can easily attach to bracelets and necklaces. Using metallic jewelry tags is one way to master your talent in stamping.
Things to Prepare and Consider in Metal Stamping
#1. Required Materials
Like any other project, metal stamping goes along with its own set of tools and equipment you will need to begin. It might be an expensive craft, interest, or hobby to pursue, but your time and money well worth it once you got all the needed materials and came up with nice works. The following materials are often widely available online and even in the craft stores:
- Stamping block
- Stamping hammer
- Metal stamps (numbers, letters, shapes, and icons)
- Stamping tape
- Metal blanks or tags
- Polishing cloth
#2. Setting Up
Get ready for a metal stamping task with these steps:
- Set up the workspace. Choose a location with a durable surface or something sturdy to endure hammering. You can put a durable wood on top of your desk or table to be sure nothing gets damaged while you’re working.
- Prepare all the tools and equipment needed and line them on the surface around you. This will make the job much easier and convenient.
- Set the stamping block before you. This way, you can stamp the scrap blank effectively.
- Use a stamping tape for keeping the blank in its place. You can also use some pieces of cut masking tapes as guides.
- Pick your stamp then line it up. Make sure it is not upside down. Hold it between your forefinger and thumb. If necessary, keep it stable with your other fingers.
- Get your hammer and hit the stamp’s top. Be sure to pay more attention to the hammer and where it should hit. It’s where practice helps. With practice, it is easier to establish the right way of hitting the stamp. Determine how hard and if you want to hit it twice.
#3. Where Should You Begin?
It’s best to begin with, simple and small projects, and keep on practicing before embarking on real projects. If you buy blanks exclusively for stamping purposes, then be sure to buy practice blanks or bigger tags to hone your technique. Flat surfaces are great for beginners because they’re quick to mark up and easy to stamp with your favorite design.
#4. Consider the Impact or Pressure
Getting the perfect balance in how hard you must hit a stamp can be hard. When you lift up the stamp and find you have almost made a marking, it is hard to pursue unless you managed to line it perfectly to avoid messing up the work. Of course, your ability in doing this will eventually improve in the long run.
Most metals will require a hard hit of the hammer to cause stamping. However, be sure to keep in mind that various alloys might take various techniques because of their fluctuating densities. Aluminum does not require too much hammering to get stamped.
#5. The Best Placement
It is very necessary to choose a design before you get started to make sure it will fit into the blank. Use a pencil and masking tape in marking out the placement before you try to stamp anything. Mark out the middle and plan outward is the best trick to get your design as clean as possible.
How to Stamp on Metal? Steps to Follow
Put the blank on the stamping block. Be sure that the stamping block sits on a hard and sturdy surface. Secure the blank to the stamping block by using a stamp guide or tape to prevent it from moving during stamping.
Use the stamp guide to lightly space out the letters and align the stamp impressions. Write the message straight on your stamp guide and use the guide markings to ensure proper spacing.
Hold the stamp on your stamping blank, forming an angle of 90 degrees.
Gently drag the stamp to the corresponding mark on your guide until your stamp gets into the corner of your guide. Be sure you don’t cause scratches on your stamping blank as you drag the stamp. Likewise, you must slightly incline the stamp to you while dragging the stamp to the guide. Hold your stamp flat firmly in its place before hitting the stamp.
Touch your stamp flush and keep in place by putting pressure and securing your hand’s side on the workspace. Hold the hammer and hit your stamp for the first time with medium pressure. Do it again to finish your desired message, word, or quote. Remove the tape and stamp guide. Harder stamps and metals with more detail will need a stronger force compared to softer stamps and metals that have less detail.
Conclusion
Stamping metal, such as your jewelry pendants or plain metal tags, is one very exciting project to get started. When you get the hang of stamping on metals, you can already take newer and more complex projects by utilizing more mediums to come up with more beautiful and unique items. You will find a multitude of mind-blowing tutorials on the internet that will help you create metal stamped items, whether they are jewelry or not. You will enjoy it for sure!