If you recently just got interested in the jewelry-making world, you may have already heard the term lapidary. What is it? In simple terms, it refers to the art of turning gemstones into a decorative work of art. Lapidarists or the craftspeople behind this process work in different ways, one of which is jewelry making.
Either you are creating something that will serve as setting for a bracelet or ring or make a pendant; there are several different ways in which you can possibly incorporate the process of lapidary into your projects. In this article, let us look into the most common lapidary supplies and see how they are used.
Common Lapidary Supplies
Before you get started with some of the common lapidary techniques you may have already learned, it is important to learn which tools and supplies you need to have and prepare. At the same time, it is also essential to learn how to use them.
- Rock Slabs (Gemstones)
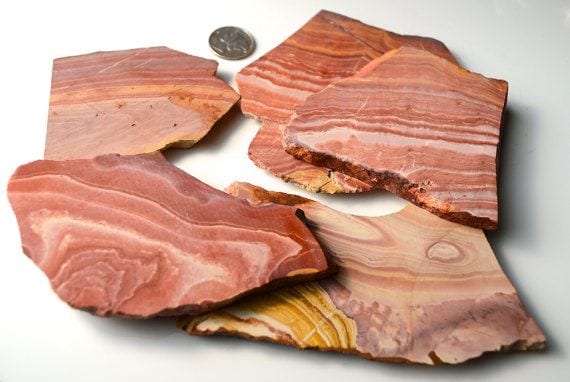
The option of whether to get some rock slabs or start with gemstones depends on whether you are planning to start from scratch or create something out of a beautiful gemstone something. For most beginners, they prefer finding an ideal gemstone to start with.
After all, this gives them an initial idea as to how the final output looks like. On the other hand, more adventurous artists find it challenging and satisfying to start with raw rock slabs. Choosing which one to start working with depends on you and your assumed skills.
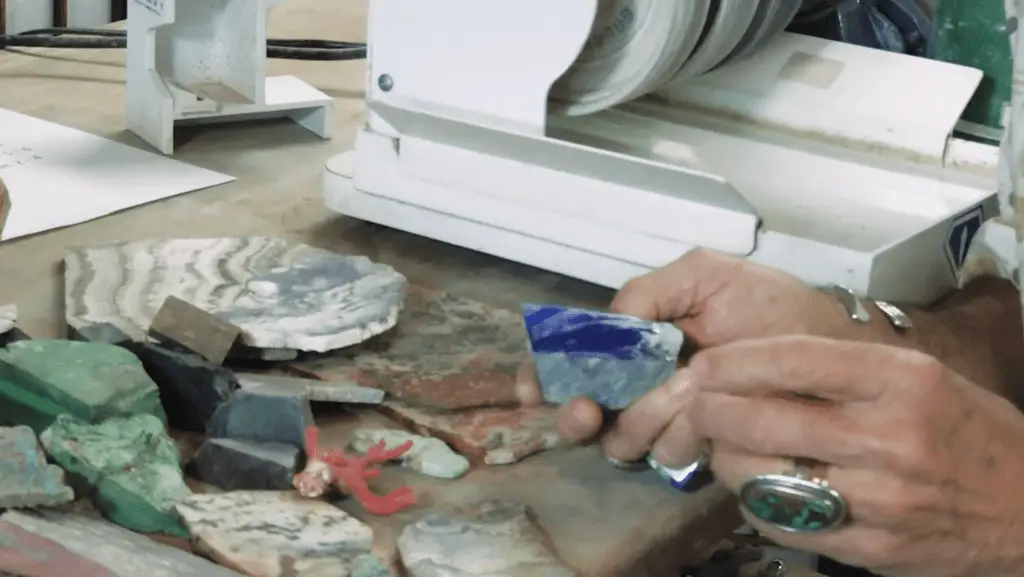
- Silicon Carbide Grinding Wheels
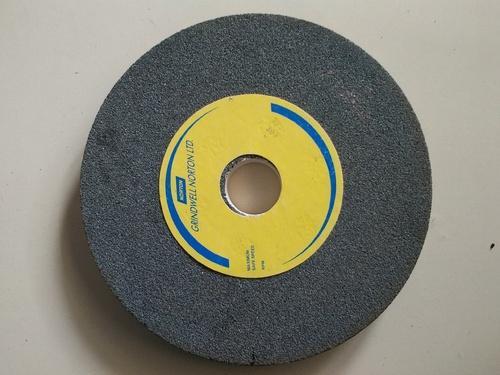
Silicon carbide is a tool that can be used in making your stones free from annoying coarse scratches and super smooth. For the longest time, silicon carbide wheels have become a staple tool in the process of cabochon cutting. There are different types of wheels out there, with different features, depending on the manufacturer.
Most of them, however, is designed specifically for lapidary and should be used together with water, which serves as its lubricant. Every silicon carbide grinding wheel is constructed using premium materials that result in fast and clean cuts. At the same time, the resulting high purity grain has the feature of being glaze resistant.
- Burnishing Powder
Burnishing powder is used in giving your stone an extra shiny finish after they are polished. Most stones that have gone through the technique of tumbling and have been polished using a rock tumbler look amazing after polishing.
However, by using a burnishing powder at the end, the luster and shine of the finished output are significantly improved. This process also typically involves running the stones under a heavy soap bath in around 30 minutes to an hour.
- Safety Glasses
Using safety glasses is very important, especially if you are sawing your rock slabs or working in cutting your gemstones. Just like when working with other projects, some small bits may enter your eyes and cause damage. Wearing safety glasses is more of a must than an option.
- Colander
A colander is used to rinse your stones if you are planning to tumble them. This is usually used at the end after the entire process is complete.
- Slab Saw or Trim Saw
A slab saw is the type of saw that is ideal when working with smaller rock slabs. On the other hand, a slab saw is the recommended equipment when working with larger pieces.
Slab saws are generally designed with larger and thicker blades compared with trim saws. With this design, they are typically ideal for cutting bigger and rougher rock pieces, cutting them into 1/8 inch- ¼ inch slabs. This is ideal for cutting geodes or cabochon making.
On the other hand, trim saws have finer blades. With this feature, these saws can be used in cutting slabs similar to a pre-drawn out type shape for cabochon cutting in an amazing accuracy, with very minimum waste to be expected.
Conclusion
Lapidary is a fun and exciting hobby. It has become a global interest, with some considering it to become a profession. If this is what you have thought of, getting the needed lapidary supplies is a good decision to make. Purchasing the equipment may mean investing in something that you will eventually need later on.
As a suggestion, it is best to start slowly. If you are a beginner, rather than focusing on the supplies right away, you may want to take some lessons from either an actual center or through online tutorials. Then, you can then start getting your own supplies as you also start learning which techniques and styles interest you, and which supplies are needed in order to complete your projects. As you continue with your hobby, you can then add new supplies and tools. You can also then start to learn the different types of equipment per category. The more you work at your skill, the better you get with this craft.