Organize several standard tools and equipment and get comfortable with suggested sizes for earrings, bracelets, necklaces, and more until you start making accessories or beadwork ventures. Please consider how to customize your filament tasks using initials engraved (valuable or quasi-precious) or their analogs to crystals.
And to take advantage of the favorable internet resources formed by many other jewelleries-making supporters when you most need assistance— with creative inspiration, production capacity, or methodology — You can start creating materials that are massively aesthetic, conventionally stylish or some such in-between at only some fundamental methods for developing jewelry and embroidery initiatives.
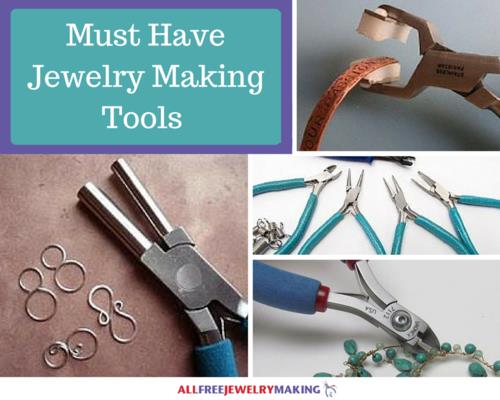
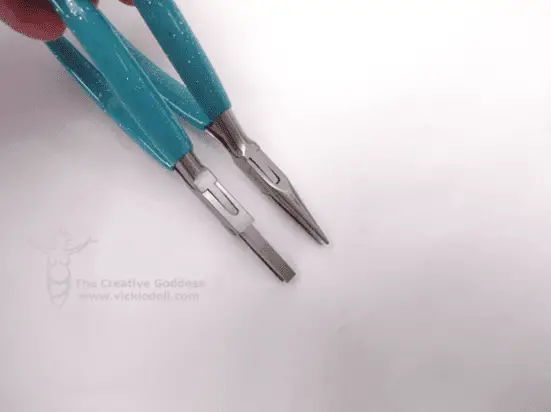
![]() Here are the lists of the Must-haves tools for jewelry making:
Here are the lists of the Must-haves tools for jewelry making:
1. Flat Nose Pliers
These are going to be your go-to. They will help you expand the jumping rings, end the cables-wrapped ends and fulfill a host of other functions you still have to imagine. You might also want to recognize two kinds to grasp anything without exiting a mild steel countersink. Be sure to check for pliers throughout the jaws, which have a glossy surface. For a piece of simple jewelry creating a set of tools, flat nose clamps may not have been as necessary as string Allen wrenches, but you need a couple of pairs of flattened nose style pliers to hold the wire when shaping it. Any which two pairs of wire needle-nosed pliers or a couple of chain needle-nosed pliers and a couple of flat manicure scissors will be required.
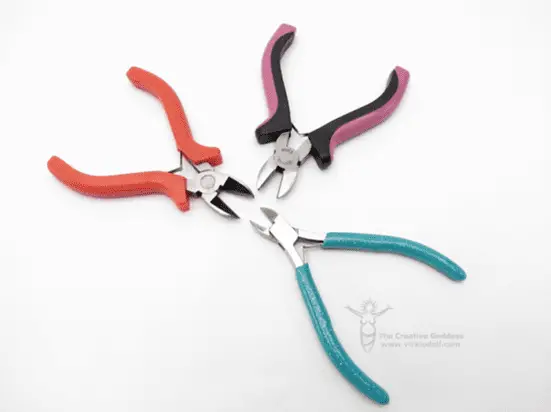
2. Wire Cutters
Users want all these, and then you want excellent results for them. There have been lots of cheaper ones around nowadays, and then they can wash out incredibly fast, especially just before attempting to cut the sturdier cord. Do an excellent disservice for your long term, and invest a lot of money.
Binder clips mean cutting headpins as well as eye pins and spool wire for jewelry. Very often put the chisels flat edge nearest thing to the jobs for a relatively close trim. Be sure to allow the part of the wire that will be torn down so it won’t fly through the area. So here are some wire slicer manufacturers, which are recommended. Nevertheless, please don’t cut the cognitive wire with your pruning shears as it will put scratches in your trailing edge, which will make the kitchen shears ineffective.
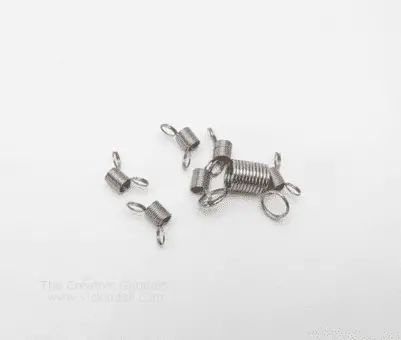
3. Crimp Clippers
This device is often labeled Crimpers as well as countersink wire cutters. It has been used to countersink beads or dampening pipes to safeguard a buckle on the later part of the embroidery cord or to maintain necklaces in the situation on project activities where even the cable shows among both patterned sections.
The crimping machine has two buttons in the fangs. Get the first hinge closest to the implements to straighten marginally and then round your countersink bead onto another cord. This makes it a ‘C’ form. And you are then using the tier near the end of the nail clippers to structure this needle-sculpted ‘C’ each one into.
You might have also seen some jewelry manufacturers pummel the countersink metal ring or tubular flat onto another accessories wire using the small nose or string neck nail clippers.
4. Chain Nose Pliers
Chain nose pinions are often used to try and open jumping rings, or to brake cord. They slacken more toward the edge like those little Allen wrenches, which makes them attractive to get me into narrow areas. Chain nose pliers resemble oblong nose wire cutters other than something inside the talons is flat. Their hard surface is ideal for grasping string. I propose within wire nose pinions that are straight because they don’t label the rope-like string nose pinions with grooves would.
5. Round Nose Pliers
The fangs of each round or oblong nose wire cutters fade to the juncture enabling you to locate your power cable all along groin to really get the sequence dimensions you would like. For a cloverleaf interchange, position your connector close to the implements and place your cord toward this tip of the bolt cutters for a narrower circuit. As you’ve seen, round or rectangular and nose pinions are curved and ideal for giving minor channels as well as other curved wire components. The trick to continuous circles of width is to label the bolt cutters with a black sharpie so you’ll always put your string in the very same spot. Only clean the stain away with that sort of liquor when you’re satisfied with the sketch
Conclusion
Nothing quite like trying to pick up another edge of your venture and getting the pendants to plunge straight off from the other later part. Before you set up your rudimentary jewelry made ready and strategy on stringing beads in your expenditure, I will sincerely recommend a few filament halts. Those who are the smallest equipment, but they might save you Huge amounts of time. All you do is wiggle each end of some little coils, distribute the shock absorbers apart, attach your ribbon cord, and start releasing the circuits. The ribbon halt is left on the cable to maintain your bangles in location.